Today I created something! You know when you just feel like you aren't accomplishing anything! You know those days when you feel like all you are doing is trying to get your baby to go to sleep or keep up with the cleaning when the kids are messing it up. Well today was one of those days for me. It took me forever to get baby David to sleep for his nap. I started thinking about what I wanted to do because who knew how long I had. I knew I wanted to make something. I wanted something tangible to hold in my hands and know I had accomplished something, but I knew I didn't have a lot of time. So I decided to share it with you because I am sure a ton of you fellow moms just need something to make every once in a while to feel accomplished. So I am starting my 20 Minute Craft Series.

Next you are going to sew along the edges but leave a one inch gap open. That way you can cut the left over strings and turn it inside out.

After that you need to take the hole that you left open and tuck the edges under so that it is nice and even. You will then sew it shut. I try and sew close to the edges so that it is less obvious. I also would try and use a discrete color that blends in but today I totally forgot. But that is all okay. Then take your bookmark to the iron and press it to make it flat and get rid of all the kinks. Next comes the fun part making it beautiful. Pick a color of thread that you would like to use for your design. I chose white and then dark blue in the bobbin so that it would pop. You can choose any stitch you like but down below is a picture of the settings I used. I made sure the foot was exactly on the edge of my fabric to get the stitch in the right place.

After you have gone around the whole book mark creating a boarder with your decorative stich and you cut off the extra string you are done! Here is what my 2 book marks look like. I hope you enjoyed this craft and want to try it out some time. If you do I would love to see your finish product be sure to post a picture of it below or tag me into the finish product on social media! I hope you have an amazing and crafty day.

Today I decided to make cloth book marks. Mind you I have not sewn anything on a sewing machine in years but it was like riding a bike. Now I am not very good at explain and giving instructions but I promise I will get better.
What do you need:
- Sewing Machine or a needle
- Thread
- Long strips of cloth
- Sewing pins
- Iron
- Scissors
What to do:
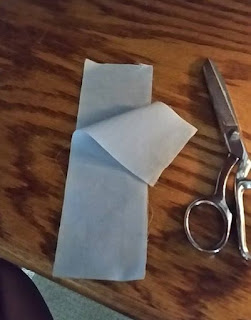
First you need to cut out your strip of cloth. I cut mine 2 1/2 inches wide and just guessed on the length. It all depends on what size books you read. If it is for say a textbook it needs to be a lot longer than for a novel or self help book. Then you need to cut another piece the same length and lay them on top of each other.

Then you need to use the sewing pins and pin them together evenly like this. (Now would be a good time to heat up your iron)

Next you are going to sew along the edges but leave a one inch gap open. That way you can cut the left over strings and turn it inside out.

After that you need to take the hole that you left open and tuck the edges under so that it is nice and even. You will then sew it shut. I try and sew close to the edges so that it is less obvious. I also would try and use a discrete color that blends in but today I totally forgot. But that is all okay. Then take your bookmark to the iron and press it to make it flat and get rid of all the kinks. Next comes the fun part making it beautiful. Pick a color of thread that you would like to use for your design. I chose white and then dark blue in the bobbin so that it would pop. You can choose any stitch you like but down below is a picture of the settings I used. I made sure the foot was exactly on the edge of my fabric to get the stitch in the right place.

After you have gone around the whole book mark creating a boarder with your decorative stich and you cut off the extra string you are done! Here is what my 2 book marks look like. I hope you enjoyed this craft and want to try it out some time. If you do I would love to see your finish product be sure to post a picture of it below or tag me into the finish product on social media! I hope you have an amazing and crafty day.

No comments:
Post a Comment